
Picture your family gathered around the kitchen island, sharing stories and laughter as dinner simmers close by. More homeowners are making the kitchen island the true heart of their home, with kitchen island renovation projects leading the way into 2025.
This guide will walk you through every step, from the latest design trends to planning, budgeting, and choosing the right materials. We will also cover smart features, practical renovation steps, and ways to make your island as functional as it is beautiful.
Ready to transform your space? Start your renovation journey with Kreeative, the local team that cares about every detail.
Kitchen Island Trends for 2025: What’s New and What’s Next
Looking ahead to 2025, kitchen island renovation is evolving fast. Homeowners want islands that look amazing, work smarter, and fit their lives perfectly. Let’s dive into what’s hot, what’s coming next, and how these trends can transform your kitchen into a true gathering place.
Evolving Design Aesthetics
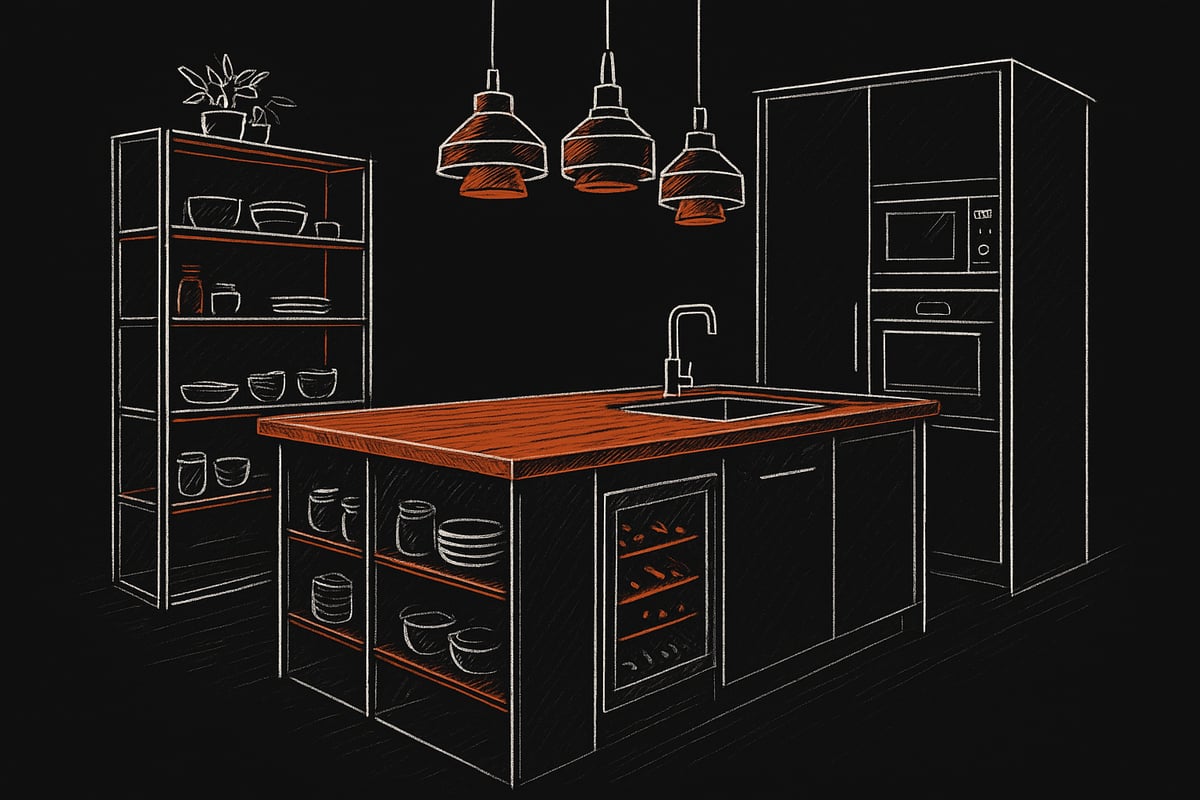
Minimalism is leading the way, but bold colors and mixed materials are making a splash in kitchen island renovation. Think matte black finishes, natural wood, and sleek quartz countertops. Homeowners are blending textures for visual interest. According to Houzz, 68% now prefer multifunctional islands, showing a shift toward practical beauty. For more inspiration and the latest style ideas, check out the Kitchen Remodeling Trends 2025. This year, islands are not just furniture, they're the centerpiece.
Smart Kitchen Islands: Technology Integration
Tech is becoming a must-have in kitchen island renovation. Charging stations, smart appliances, and touchless faucets are popping up everywhere. Imagine prepping dinner while your devices charge or using a voice-activated oven built into your island. Some Okanagan families are even adding pop-up outlets and wireless speakers. By choosing future-proof features, you make your kitchen ready for years to come. These upgrades keep your space modern and convenient.
Sustainability and Eco-Friendly Choices
Sustainability is front and center in kitchen island renovation. More people are choosing recycled materials, sustainable woods, and energy-efficient LED lighting. Bamboo countertops and locally sourced cabinetry are popular picks. According to the NKBA, 54% of renovators now prioritize eco-friendly materials. Choosing green options not only helps the planet but also adds long-term value to your home. Smart lighting choices can lower energy bills, too.
Customization and Personalization
Personal touches make a kitchen island renovation feel truly yours. Homeowners are adding built-in wine fridges, pet stations, and cozy breakfast nooks. The best islands are designed around your family's routine. For example, one Okanagan family created a homework station right in their island, blending meal prep and study time. Custom sizing and features mean your island fits your space and lifestyle perfectly. That’s what makes every project unique.
Open Concept and Space Optimization
Open concept kitchens are still trending, especially in kitchen island renovation. Designs now focus on smooth traffic flow and maximizing seating. Islands double as dining tables, homework spots, or party hubs. Open-plan kitchens can increase home value by up to 15% according to Remodeling Magazine. Choosing the right layout ensures your kitchen feels welcoming and functional, no matter how many people gather around.
Storage Solutions
Smart storage is a game changer in kitchen island renovation. Pull-out drawers, hidden cabinets, and appliance garages keep clutter out of sight. Creative storage boosts both style and function, letting you tuck away everything from mixers to recycling bins. Deep drawers are great for pots and pans, while custom organizers help keep utensils handy. A well-designed island makes daily life easier and more organized.
Lighting Innovations
Lighting is the finishing touch in any kitchen island renovation. Pendant lights create a focal point, while under-counter LEDs brighten up prep zones. Statement fixtures in bold colors or shapes can add personality. Layered lighting, combining task and ambient sources, brings warmth and versatility. The right lighting sets the mood for everything from morning coffee to family dinners.
Talk to Kreeative about your next kitchen island renovation. Our local team handles every detail, from design to build, with craftsmanship and care you can trust.
Planning Your Kitchen Island Renovation: Budget, Layout, and Design
Renovating your kitchen island is a big step toward creating a space that fits your family and lifestyle. The planning stage can feel overwhelming, but breaking things down helps. Let’s walk through the essentials, from budgeting to working with pros, so your kitchen island renovation goes smoothly.

Setting a Realistic Budget
Before you start your kitchen island renovation, get clear on your budget. Costs can range from $3,000 to $7,000, depending on materials, size, and labor. Think about what factors matter most—do you want custom cabinetry, or will prefab do the trick? Each choice affects the price.
To avoid surprises, list out your must-haves and nice-to-haves. Consider the cost of materials, labor, and any specialty features like a wine fridge or built-in charging station. For a detailed breakdown of what you might spend, check out this kitchen redesign cost breakdown to help you plan smarter.
Comparing quotes from several contractors can also uncover hidden costs, so never skip this step.
Assessing Your Space and Layout
A great kitchen island renovation starts with measuring your space. Make sure there’s enough clearance around the island for people to move comfortably—aim for at least 36 inches of walkway space. If you want seating, add extra room for chairs or stools to pull out easily.
Use simple tools like a measuring tape or try digital planners to visualize your new layout. If the space feels tight, consider a smaller island or creative shapes. Good flow makes cooking, gathering, and cleaning much easier.
Think about lighting, appliance placement, and how the island will fit with existing cabinets. This careful planning will make your kitchen island renovation more functional and enjoyable.
Defining Your Needs and Must-Haves
Ask yourself what you want from your kitchen island renovation. Is it a spot for cooking, entertaining, homework, or all three? For families, extra storage and seating might be the priority. Empty nesters may want a sleek prep station or a breakfast nook.
Write a list of your must-haves versus nice-to-haves. Maybe you need deep drawers for pots, or a built-in pet feeding area. Prioritizing your needs helps keep your kitchen island renovation on track and within budget.
Don’t forget to consider future needs—growing families or changing lifestyles can impact what features are most useful down the road.
Gathering Inspiration and Creating a Vision Board
Start collecting ideas for your kitchen island renovation early. Browse Pinterest, Houzz, or visit local showrooms for inspiration. Save photos, material samples, and color swatches that catch your eye.
Creating a vision board or mood board helps clarify your style and keeps you focused. Comparing sample materials side by side makes it easier to decide what works best for your space. This step ensures your kitchen island renovation stays true to your vision.
Involve family members in the process—sometimes the best ideas come from unexpected sources.
Working with Professionals
Hiring a professional can make your kitchen island renovation much smoother. Designers and contractors know the ins and outs of building codes, permits, and what works best for Okanagan homes. They’ll help you avoid costly mistakes and keep your project on schedule.
Ask about their experience, review portfolios, and check references. A good pro will listen to your goals, suggest smart solutions, and communicate clearly throughout the process.
Choosing the right team ensures your kitchen island renovation is done right, with attention to detail and lasting quality. Talk to Kreeative about your next project and start your renovation with a team that cares.
Step-By-Step Kitchen Island Renovation Process
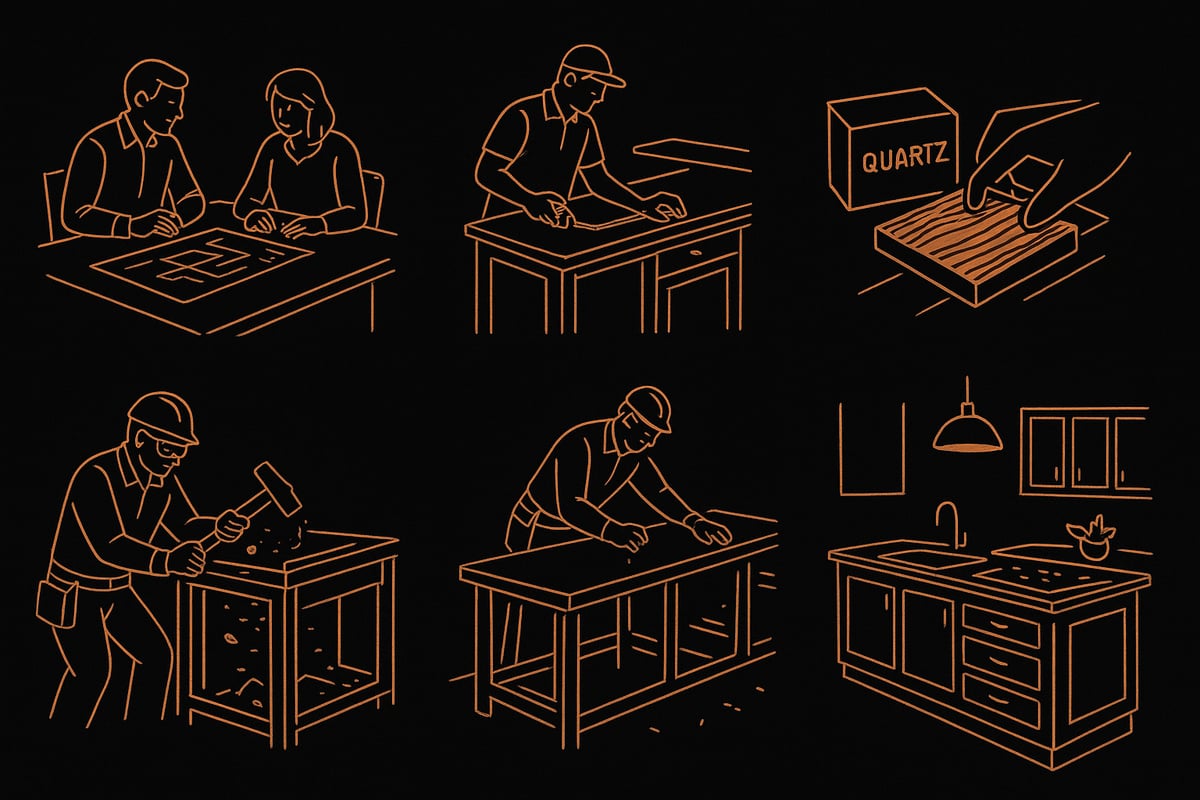
Thinking about a kitchen island renovation can feel overwhelming, but breaking it into steps makes the process clear and manageable. Here’s how local Okanagan experts at Kreeative approach every project, ensuring every detail is covered and nothing gets missed.
Step 1: Initial Consultation and Design Planning
Every successful kitchen island renovation starts with a conversation. During the initial consultation, you’ll meet with a designer or contractor to share your goals, must-haves, and vision for your dream island.
The team will walk through your space, ask about your lifestyle, and discuss design ideas. This is when you can explore the possibilities—like extra seating, smart appliances, or more storage. Bringing photos, inspiration boards, and a list of priorities helps make the process smooth.
A professional’s insight is invaluable at this stage, ensuring your kitchen island renovation stays on track from day one. For more guidance, check out the Expert home renovations guide for tips on working with a pro who cares about quality and local expertise.
Step 2: Measuring and Site Preparation
Precise measurements are key to a successful kitchen island renovation. Your contractor will carefully measure the available space, taking into account walkways, appliances, and seating.
They’ll also check the floor for levelness and mark out the island footprint. Before demo begins, the area gets cleared—old islands or cabinets are removed, and the kitchen is prepped for work.
If you’re living at home during the renovation, protective barriers and dust control measures keep the rest of your house clean and safe. This step sets the foundation for everything that follows.
Step 3: Material Selection and Ordering
Choosing materials is one of the most exciting parts of a kitchen island renovation. You’ll select countertops (like quartz, granite, or butcher block), cabinetry, hardware, and fixtures.
Lead times for materials can vary, especially for custom pieces or trending finishes. For example, quartz countertops might take a few weeks, while custom cabinets could require more planning. Comparing options—such as quartz versus granite—helps match your style and budget.
Once choices are made, your contractor orders everything, tracking shipments so the project stays on schedule.
Step 4: Demolition and Structural Work
Demolition is where the transformation begins in your kitchen island renovation. The existing island or cabinetry is removed safely, with care taken to protect flooring and walls.
If plumbing or electrical needs updating, this is the time to address it. According to NAHB, 40% of kitchen projects require electrical upgrades, especially when adding outlets or lighting.
Structural work might include reinforcing the floor for a heavy countertop or adjusting plumbing for a new sink. By handling this step with care, your renovation avoids costly surprises later.
Step 5: Installation of Island Base and Utilities
With the site prepped, the island base is built according to your kitchen island renovation plan. Skilled carpenters construct the frame, ensuring it’s level and secure.
If your design includes a sink, cooktop, or outlets, rough-ins for plumbing and electrical are completed now. Licensed trades handle these tasks to meet local codes and safety standards.
Proper coordination at this stage keeps everything running smoothly. The island begins to take shape, and you can finally see your vision coming to life.
Step 6: Countertop and Appliance Installation
Now comes the moment when your kitchen island renovation really shines. The countertop is carefully positioned and secured—whether it’s sleek quartz, classic granite, or warm butcher block.
Appliances such as a sink, cooktop, or built-in microwave are installed next. Some homeowners opt for extras like downdraft vents or pop-up outlets for added convenience.
Your contractor double-checks all connections and makes sure everything fits perfectly. Each detail is reviewed to ensure quality and function.
Step 7: Finishing Touches and Final Inspection
The last step in any kitchen island renovation is all about the details. Painters add the final color, hardware is installed, and lighting fixtures are set in place.
A full walkthrough with your contractor allows you to review the work, create a punch-list if needed, and ensure your expectations are met. Safety and code compliance are verified before the job is considered complete.
You’re left with a beautiful, functional kitchen island that’s ready for years of meals, homework, and memories. Ready to start your own project? Talk to Kreeative about your next kitchen island renovation—they’re here to help every step of the way.
Choosing Materials and Features for Your Dream Island
Designing your kitchen island renovation means picking the right materials and features that balance style, durability, and function. Each choice you make shapes how your island looks, feels, and works for years to come. Let’s break down the top decisions you’ll face, so your kitchen island renovation feels truly custom and built for life in the Okanagan.
Countertop Options: Pros and Cons
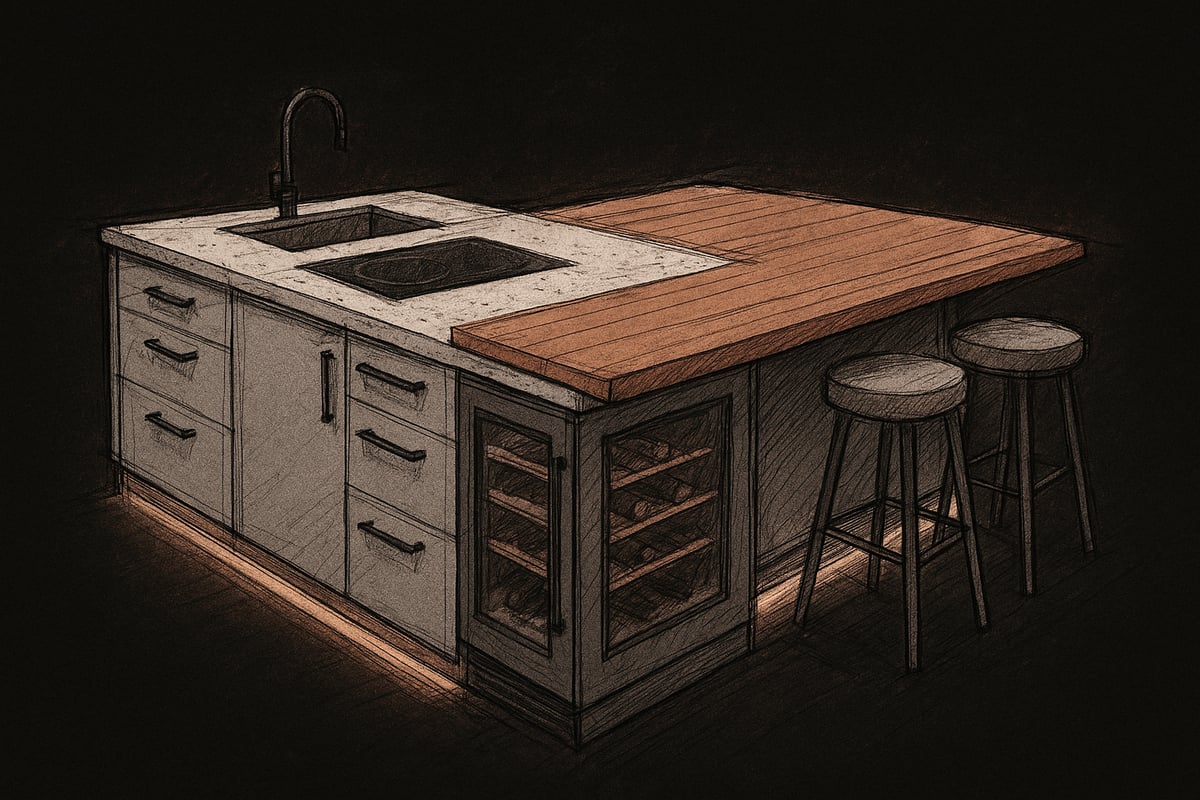
Countertops are the visual anchor of any kitchen island renovation. Quartz is a top pick for its durability and low maintenance, while granite offers a unique, natural look. Butcher block is warm and great for prepping food, though it needs regular oiling. Laminate is affordable and comes in many styles, but it can scratch more easily. Choose what fits your lifestyle, whether you’re after a family-friendly surface or a touch of luxury.
Cabinetry and Storage Solutions
Cabinet choices set the tone for both style and storage in your kitchen island renovation. Custom cabinets allow you to maximize every inch, adding deep drawers or pull-out shelves for pots, pans, and snacks. Stock cabinets are budget-friendly and still provide solid options for most spaces. Think about hidden trash bins, appliance garages, and organizers to keep your island tidy and functional, no matter the kitchen size.
Seating and Dining Features
Seating is a big part of any kitchen island renovation, especially if you love to gather with family or friends. Consider bar stools for quick breakfasts or built-in bench seating for cozy meals. Allow at least 24 inches per seat for comfort, and choose adjustable heights if you have kids or guests of all ages. A well-planned seating area turns your island into a true social hub.
Appliance Integration and Smart Features
Modern kitchen island renovation projects often include built-in microwaves, wine coolers, or even induction cooktops. Smart features like charging stations or touchless faucets make life easier and keep counters clutter-free. For more on how technology is shaping kitchen design, explore the latest Kitchen Design Trends 2025. These upgrades help future-proof your island and add real convenience.
Hardware, Fixtures, and Finishes
Small details make a big impact in your kitchen island renovation. Matte black handles, brushed gold knobs, or mixed-metal fixtures can create a bold statement. Coordinate your faucet, lighting, and cabinet hardware for a seamless look. Trending finishes for 2025 include sleek lines and tactile, easy-to-clean surfaces that stand up to busy households.
Flooring and Lighting Considerations
Don’t forget what’s underfoot and overhead during your kitchen island renovation. Water-resistant flooring like luxury vinyl plank or tile is a smart choice for high-traffic areas. For lighting, combine pendant lights for style, under-counter LEDs for tasks, and accent fixtures for warmth. Layered lighting not only boosts function but also sets the mood for every meal or gathering.
Talk to Kreeative about your next kitchen island renovation, and let our local team guide you from design to build with care, craftsmanship, and attention to every detail.
Maximizing Functionality: Storage, Seating, and Workflow
A successful kitchen island renovation is about more than good looks. It is about making your island work for your family, your routines, and your space. Smart design helps you cook, gather, and live better every single day.
Smart Storage Solutions
Clutter takes away from kitchen flow. When planning your kitchen island renovation, focus on storage that is easy to access and keeps things organized. Deep drawers for pots and pans, pull-out shelves for spices, and hidden trash bins are must-haves for many families.
Consider adding appliance garages to hide small gadgets, or open shelving for cookbooks and baskets. Creative storage not only looks sleek, it makes daily cleanup and meal prep faster. For real inspiration, check out this recent kitchen renovation project that features clever storage built right into the island.
Flexible and Functional Seating
A kitchen island is often the main gathering spot. Think about how many people need to sit, and whether you want bar stools, bench seating, or a mix of both. For most kitchen island renovation projects, comfortable seating means at least 24 inches of width per seat and enough room for everyone to move around.
Flexible options, like adjustable stools or a breakfast nook, let you adapt for family meals, homework, or guests. Did you know that over 60 percent of homeowners say island seating is their favorite feature, according to Kitchen Renovation Statistics 2024? Plan seating that fits your lifestyle today and tomorrow.
Workflow and Work Zones
A great kitchen island renovation improves how you work. Create clear prep, cooking, and serving areas. Place the sink near the prep zone, and keep the trash and dishwasher close by. This triangle makes meal prep smooth and keeps traffic moving.
If more than one person cooks at once, design separate work zones. Use countertop space at different heights for baking or chopping. Keep utensils and bowls within arm’s reach. Efficient workflow means less back-and-forth and a more enjoyable cooking experience for everyone.
Multi-Level and Family-Friendly Features
Consider a multi-level island for your kitchen island renovation. A raised bar can double as a serving space or homework station, while a lower counter is perfect for baking or rolling dough. This setup suits families with kids and adults who use the kitchen for more than cooking.
Add built-in pet feeding stations or a spot for a wine fridge if that fits your needs. Tailored features help your island fit your daily life, not just special occasions. Think about what your family does most, and make it part of your design.
Power, Charging, and Using Vertical Space
Do not forget about outlets and charging stations during your kitchen island renovation. Built-in USB ports or pop-up outlets make it easy to charge devices or use small appliances without cluttering the counter.
Make use of vertical space with hanging racks for pots or floating shelves for mugs and plants. Good lighting, such as under-counter LEDs, brightens up your work areas and adds a cozy feel. These small touches turn your kitchen island into the true hub of your home.
Kreeative specializes in kitchen island renovation projects that balance storage, seating, and workflow with a local, caring touch. Ready to make your kitchen island work for you? Talk to Kreeative about your next project and see what functional design can do for your home.
Avoiding Common Kitchen Island Renovation Mistakes
Ever seen a beautiful new kitchen island that just does not work in real life? It happens more often than you think. Even experienced homeowners can run into trouble during a kitchen island renovation. From space issues to budget surprises, a few common mistakes can turn your dream project into a headache. Let’s walk through the top pitfalls—and how to dodge them.
Space and Workflow: The Most Common Pitfalls
One of the biggest kitchen island renovation mistakes is underestimating space. Islands that are too large or too close to cabinets can block traffic and disrupt kitchen flow. Always measure carefully, leaving enough room for people to move around comfortably.
- Not enough clearance for open drawers or appliances
- Seating that bumps into walls or other furniture
- Poor sight lines that make the kitchen feel cramped
Ignoring workflow can also make cooking a chore. Think about how you prep, cook, and clean. A well-planned kitchen island renovation creates clear, easy paths for everyone.
Budgeting and Material Choices: Where Projects Go Off Track
Budget overruns are a classic kitchen island renovation problem. Hidden costs pop up fast—demo, electrical upgrades, or last-minute material changes all add up. To stay on track, get detailed quotes and expect the unexpected.
Choosing the wrong materials for your lifestyle is another trap. Fancy finishes might look great, but are they durable and easy to clean? If you want to stretch your budget further, check out these money-saving renovation tips for practical advice.
| Mistake | Impact | Solution |
|---|---|---|
| Underestimating costs | Budget overruns | Plan with buffers |
| Wrong materials | Early wear | Match your lifestyle |
Customization and the Future: Balancing Now and Later
It is tempting to go all-in on the latest trends during a kitchen island renovation. But over-customizing can make your space feel dated fast. Instead, balance trendy features with timeless design. Ask yourself: will this island still fit my needs in five years? If you plan to sell, think about what future buyers might want.
- Avoid features that limit flexibility, like oddly shaped counters
- Mix classic materials with a few bold accents
- Plan for kids, pets, or changing family needs
A real-life example? One family added a giant wine fridge, but later wished they had more storage for kids’ snacks as their family grew.
Professional Help and Smooth Renovation Tips
DIY is great for small projects, but a full kitchen island renovation needs expertise. Professional installation ensures everything meets code and works safely. Skipping this step can lead to costly repairs or even safety hazards.
- Always check credentials and reviews before hiring
- Stay in touch with your contractor and ask questions
- Build in extra time and cash for surprises
Good communication, flexibility, and a little patience help every kitchen island renovation go smoothly. At Kreeative, we believe every detail matters, from the first sketch to the final inspection. Ready to avoid the common pitfalls and get results you love? Talk to Kreeative about your next project—we’re here to help every step of the way.
You’ve just explored the ins and outs of creating the perfect kitchen island for 2025—from smart features and bold materials to clever storage solutions and future-proof design choices. Maybe you’re picturing that dream space already, but wondering how to bring it to life or where to even start. That’s where we come in! At Kreeative Renovations & Design Co., we’ve spent over three decades helping homeowners like you turn renovation dreams into reality, tailored exactly to your needs. Ready to chat about your ideas or get some expert advice? Book Your Free Consultation and let’s make your kitchen island the heart of your home.


