
If you own a home built in the 1970s in the Okanagan, Sicamous, or Shuswap region, you're sitting on a property with tremendous potential. These homes were built during a unique era that prioritized durability and simplicity, but often came with design choices that feel dated today. A 1970s house renovation can breathe new life into your space while addressing common issues like poor insulation, closed-off layouts, and outdated finishes. With over 32 years of experience transforming properties across the region, we've seen firsthand how the right approach can turn these homes into modern, functional spaces that honor their original bones while meeting today's lifestyle needs.
Understanding What Makes 1970s Homes Unique
The 1970s brought distinct architectural trends that define these properties. Split-level designs became incredibly popular, along with ranch-style layouts that sprawled across generous lots. You'll often find attached garages, low-pitched roofs, and exterior materials like brick, wood siding, or stucco that were built to last.
Common characteristics include:
- Large windows that let in natural light but may lack energy efficiency
- Open living and dining areas, though not as open as modern concepts
- Built-in features like breakfast nooks and conversation pits
- Solid construction with good bones underneath dated finishes
- Generous room sizes compared to newer builds
However, these homes also come with challenges. Before starting your renovation, it's worth understanding that insulation standards were minimal compared to today, electrical systems may need updating, and materials like popcorn ceilings and shag carpeting definitely need to go.
The key to a successful 1970s house renovation lies in recognizing what's worth keeping and what needs changing. That solid foundation and quality framing? Absolutely keep it. The harvest gold appliances and dark paneling? Time for those to move on.
Structural Assessment Comes First
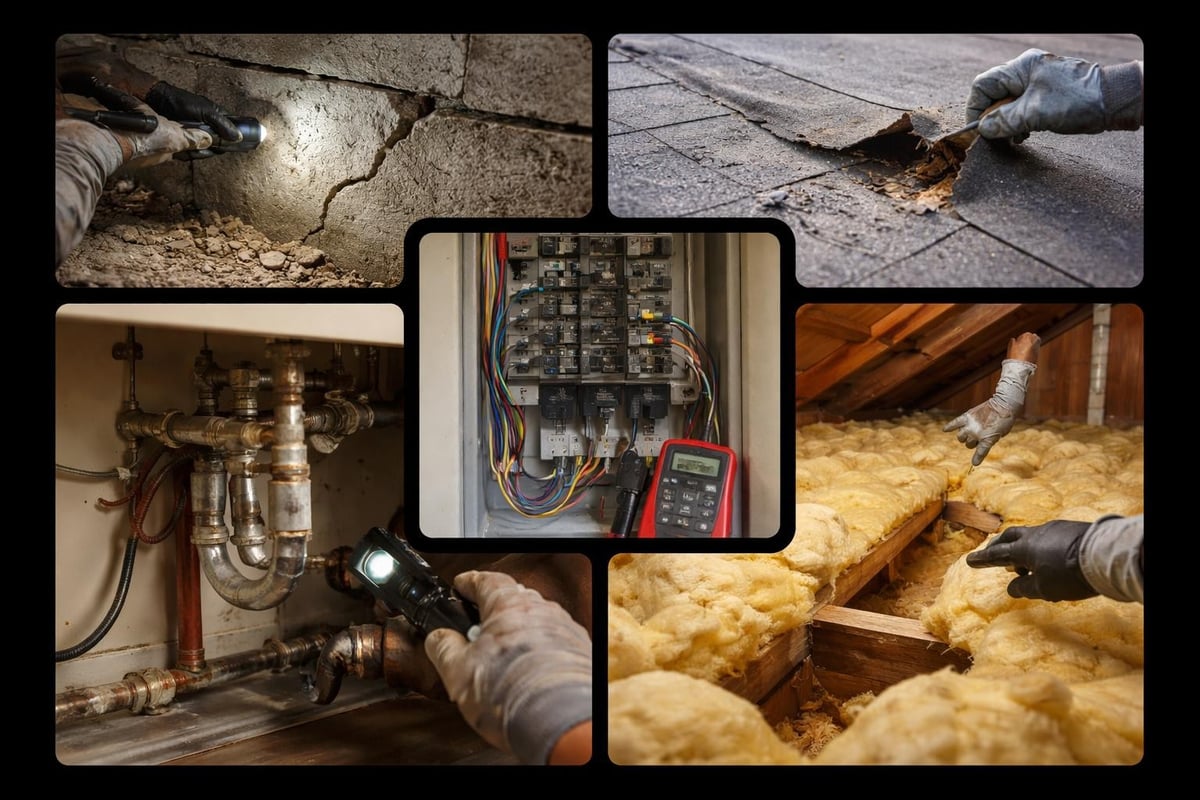
Before you start dreaming about finishes and paint colors, get a thorough structural assessment. We recommend this for every Okanagan renovations project, especially with homes that are 50+ years old. Check for foundation issues, roof condition, plumbing integrity, and electrical capacity.
Many 1970s homes in our region have held up remarkably well, but moisture issues can develop over decades, particularly in bathrooms, kitchens, and basements. If you're near the lake in Sicamous or Shuswap, humidity and seasonal freeze-thaw cycles may have taken their toll on certain materials.
Tackling the Layout and Floor Plan
One of the biggest advantages of a 1970s house renovation is the opportunity to reimagine the floor plan. These homes were built when formal dining rooms and separated spaces were the norm, but modern families want connection and flow.
Popular layout modifications include:
- Removing walls between kitchen and living areas
- Converting formal dining rooms into multifunctional spaces
- Opening up the entry to create better sightlines
- Integrating the attached garage into living space
- Reconfiguring awkward split-level transitions
The construction methods of the 1970s often used load-bearing walls differently than today, so working with experienced contractors who understand structural requirements is essential. We've completed numerous kitchen remodel Okanagan projects where opening up walls transformed the entire home's functionality.
Creating Modern Open Concepts
Modernizing 1970s homes often centers on creating the open-concept living that today's homeowners expect. The good news? These homes typically have room sizes that support this vision without major structural gymnastics.
Consider how your family actually uses space. Do you need a formal living room, or would that square footage work better as an extended kitchen and great room? Can the breakfast nook area become part of a larger island workspace? These questions guide smart renovation decisions.
When planning your layout changes, think about natural light flow. Those big 1970s windows are an asset, but you might want to add or relocate some to optimize brightness in your new configuration. Strategic window placement can make a dramatic difference in how spaces feel.
| Layout Challenge | Modern Solution | Considerations |
|---|---|---|
| Closed-off kitchen | Remove non-load-bearing walls | May require beam installation |
| Formal dining room | Convert to office or open to living area | Maintains resale flexibility |
| Split-level stairs | Improve railings and sightlines | Update with modern materials |
| Dark hallways | Add skylights or interior windows | Brings light to core areas |
Updating Systems and Energy Efficiency
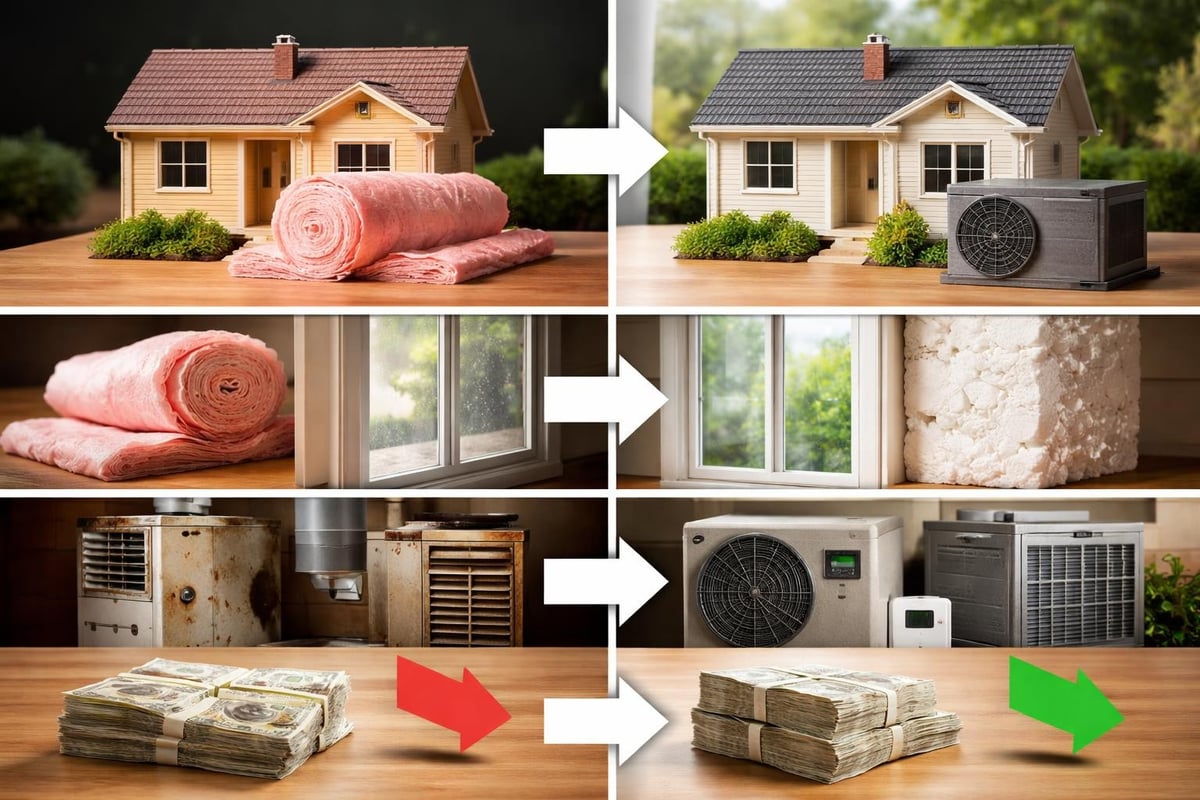
Here's where a 1970s house renovation really pays off long-term. Homes from this era were built before modern energy codes, meaning they're often expensive to heat and cool. Upgrading insulation, windows, and HVAC systems can cut your utility bills dramatically while improving comfort.
Priority system upgrades:
- Spray foam or blown-in insulation to meet current standards
- Energy-efficient windows with proper sealing
- Modern furnace or heat pump systems
- Updated electrical panel with adequate amperage
- Low-flow plumbing fixtures and modern water heaters
In the Okanagan climate, where we experience both hot summers and cold winters, proper insulation makes a huge difference. Attics are often the easiest place to start, followed by exterior walls if you're already opening them up for other work.
Don't overlook ventilation. Many 1970s bathrooms and kitchens have inadequate exhaust fans or none at all. Proper ventilation prevents moisture damage and improves air quality throughout your home. This becomes especially important if you're tightening up the building envelope with better insulation and windows.
Electrical and Plumbing Considerations
Most 1970s homes were wired for far fewer electrical demands than we have today. Between computers, charging stations, kitchen appliances, and entertainment systems, modern homes need significantly more circuits and outlets.
Plan for:
- Panel upgrades to 200-amp service minimum
- Additional circuits for kitchen and laundry areas
- GFCI protection in bathrooms and kitchens
- Dedicated circuits for major appliances
- Smart home wiring if desired
Plumbing systems from this era might include materials that are now considered problematic. Research on renovating older homes shows that updating these core systems provides the best long-term value, even though they're not the glamorous part of renovation.
Transforming Interior Finishes and Style
Once the bones and systems are sorted, the fun part begins. Interior finishes in 1970s homes often include wood paneling, popcorn ceilings, linoleum flooring, and bold wallpaper patterns. While some homeowners appreciate the retro aesthetic, most prefer a cleaner, more contemporary look.
Ceilings and Walls
Removing popcorn ceilings is one of the most transformative changes you can make. It instantly modernizes a space and creates a cleaner backdrop for whatever design direction you choose. Just be aware that homes from this era may contain asbestos in ceiling texture, so professional testing and removal is essential.
Wood paneling can either be removed entirely or, in some cases, updated with paint. We've seen beautiful results both ways depending on the quality of the wood and the desired aesthetic. Drywall replacement gives you a fresh start and allows for modern wall finishes.
For a successful bathroom renovation Sicamous project or any interior update, consider texture and depth. Shiplap, board-and-batten, or other wall treatments can add character without feeling dated. The interior renovation services we provide often include creative solutions that balance budget with impact.
Flooring Throughout
Original 1970s flooring rarely survives in good condition. You'll likely encounter:
- Worn carpeting over hardwood (sometimes)
- Linoleum in kitchens and bathrooms
- Parquet or laminate wood in living areas
- Ceramic tile in dated colors and patterns
Modern flooring options offer durability, style, and easier maintenance. Luxury vinyl plank has become incredibly popular for its water resistance and realistic wood appearance. Engineered hardwood provides warmth and value. Large-format tiles create a contemporary look in bathrooms and kitchens.
Whatever you choose, proper subfloor preparation makes all the difference. After 50 years, you may find squeaks, uneven sections, or moisture damage that needs addressing before new flooring goes down.
Kitchen and Bathroom Renovations
These two areas see the heaviest use and often need the most work in a 1970s house renovation. Original kitchens typically feature limited counter space, outdated appliances, and inefficient layouts. Bathrooms might have colorful fixtures, small vanities, and inadequate lighting.
Kitchen priorities include:
- Expanding counter and storage space
- Updating appliances to energy-efficient models
- Improving lighting with layered approach
- Installing functional islands or peninsulas
- Choosing durable, timeless materials
For bathrooms, focus on improving functionality first. Can you expand the shower? Add a double vanity? Improve storage? These practical upgrades matter more than fancy finishes. That said, modern fixtures, proper ventilation, and good lighting transform how these spaces feel and function.
Working with experienced contractors ensures proper waterproofing and ventilation, both critical in our regional climate. You can explore more about transforming these spaces through resources on old kitchen renovation approaches that honor your home's character while meeting modern standards.
| Room Type | Common 1970s Issues | Modern Solutions |
|---|---|---|
| Kitchen | Limited counters, dated cabinets | Expand layout, custom storage |
| Primary Bath | Single vanity, small shower | Double vanity, walk-in shower |
| Guest Bath | Colorful fixtures, poor lighting | Neutral palette, LED fixtures |
| Powder Room | Cramped, dark | Expand if possible, maximize light |
Exterior Updates and Curb Appeal
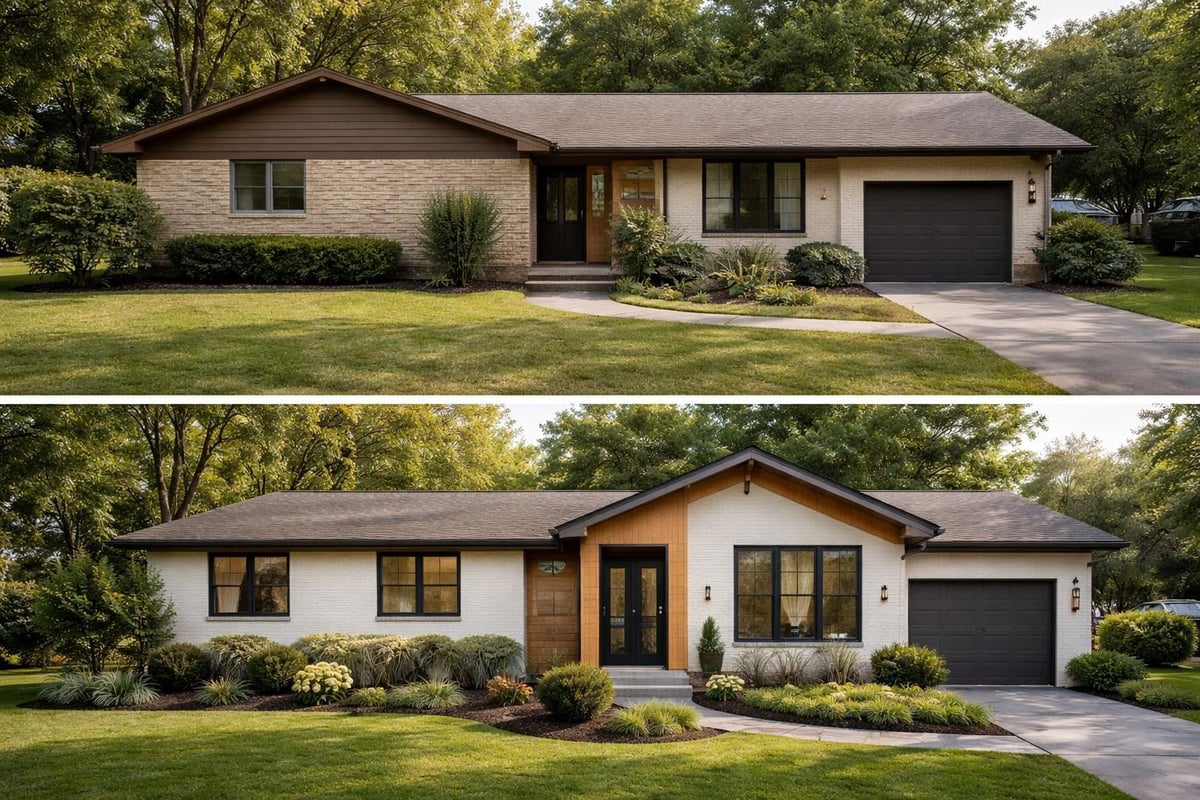
Don't forget the outside of your home. Exterior makeovers for 1970s brick houses can completely change how your property presents itself. Common exterior materials from this era hold up well structurally but may look tired or dated.
Exterior renovation options:
- Fresh paint or stain on siding
- Updated front door and hardware
- Modern garage doors
- Improved landscaping and hardscaping
- New or replacement windows
- Updated roofing materials
- Contemporary lighting fixtures
Many 1970s homes in the Okanagan have low-pitched roofs that were practical but lack architectural interest. Adding gables, dormers, or changing rooflines can create dramatic improvement, though these are more extensive projects. Sometimes simply updating the fascia, soffits, and trim makes a surprising difference.
Consider your property's relationship to outdoor living. These homes often have basic decks or patios that could evolve into beautiful outdoor rooms perfect for our regional summers. Detailed guides on 1970s house renovation often emphasize how extending living space outdoors maximizes your investment.
Working With Design Professionals
While some homeowners tackle portions of a 1970s house renovation themselves, most benefit from professional guidance. Architects, designers, and experienced contractors bring expertise that saves money and prevents mistakes. We've seen too many DIY projects that created problems requiring expensive fixes.
Professional help provides:
- Code compliance expertise
- Design solutions you might not imagine
- Access to quality trades and materials
- Project management and scheduling
- Problem-solving when surprises arise
Case studies of successful renovations demonstrate how professional design thinking transforms spaces beyond simple cosmetic updates. The investment in good planning pays dividends throughout the project and in your finished home.
For homes in rural areas around Sicamous or lake-access properties in the Shuswap, working with contractors familiar with local conditions matters even more. Soil types, access challenges, and regional building practices all influence how projects unfold.
Budget and Timeline Planning
Most 1970s house renovations cost more and take longer than initially expected. That's not pessimism – it's reality based on decades of experience. Once you open walls, you discover issues that weren't visible during planning. Materials take time to arrive. Weather affects schedules.
Plan for:
- 10-20% contingency in your budget
- Timeline buffers for delays and discoveries
- Phasing if doing the entire home at once isn't feasible
- Temporary living arrangements for major work
- Regular communication with your contractor team
Breaking projects into phases often makes sense financially and practically. Maybe start with the kitchen and main living areas, then tackle bathrooms and bedrooms in a second phase. This approach lets you live through renovations more comfortably and spread costs over time.
Maintaining Period Character While Modernizing
Some homeowners want to preserve elements of their home's 1970s character while updating functionality. This balanced approach requires thoughtful decision-making about what stays and what goes.
Elements worth preserving might include:
- Quality hardwood flooring under carpet
- Brick accent walls in good condition
- Built-in shelving and cabinetry
- Interesting ceiling treatments
- Original tile in excellent shape
The key is integration. That brick fireplace wall might look dated surrounded by wood paneling and harvest gold, but cleaned up and paired with modern furnishings, it becomes a stunning focal point. Exploring eclectic approaches shows how mixing eras creates unique, personal spaces.
Work with your design team to identify features worth keeping and how to make them work in your updated home. Sometimes it's simply about changing what surrounds these elements rather than removing them entirely.
Permits and Regulations
Any significant 1970s house renovation requires proper permits. This isn't bureaucracy for its own sake – it's about safety, code compliance, and protecting your investment. Unpermitted work can create major headaches when you sell and may not be covered by insurance if something goes wrong.
Required permits typically cover:
- Structural changes and wall removal
- Electrical system updates
- Plumbing modifications
- Window and door replacements
- Roof work and major exterior changes
Professional contractors handle permit applications and inspections as part of their service. This ensures work meets current building codes, which have evolved significantly since the 1970s. What was acceptable then doesn't meet today's standards for safety, energy efficiency, and accessibility.
Regional requirements vary between municipalities in the Okanagan, Sicamous, and Shuswap areas. Local contractors understand these nuances and navigate the process smoothly, keeping your project on track without regulatory delays.
Sustainability and Future-Proofing
Modern 1970s house renovation thinking includes sustainability and long-term adaptability. Choosing durable materials, energy-efficient systems, and flexible layouts creates homes that serve you well for decades to come.
Sustainable renovation strategies:
- Salvaging and reusing materials where possible
- Selecting low-VOC paints and finishes
- Installing energy-efficient appliances and systems
- Choosing locally-sourced materials when available
- Designing for future accessibility needs
Expert renovation guides emphasize that thinking long-term during your renovation saves money and resources over your home's lifetime. That extra investment in quality insulation or durable finishes pays back through lower operating costs and reduced maintenance.
Consider how your needs might change over time. Main-floor bedrooms and bathrooms become increasingly valuable as we age. Wide doorways and hallways accommodate mobility aids if needed. Flexible spaces adapt to changing family situations without major renovation.
Regional Considerations for Okanagan Properties
Renovating in the Okanagan, Sicamous, and Shuswap regions brings specific considerations. Our climate patterns, building materials availability, and local architectural context all influence renovation decisions.
The temperature swings we experience demand robust insulation and quality windows. Homes near the lake face additional moisture considerations. Rural properties might have septic systems requiring special attention during plumbing updates. Access can be challenging on certain properties, affecting material delivery and waste removal.
Working with a Sicamous contractor or team experienced in Shuswap renovations means they understand these regional factors instinctively. They know which materials hold up best in our climate, which systems work most efficiently, and how to solve problems specific to our area.
Local building supply relationships also matter. Experienced regional contractors have established connections that can mean better pricing, faster material availability, and access to specialty items that make your renovation special.
Transforming a 1970s home into a modern, efficient, and beautiful space requires expertise, planning, and quality execution. Whether you're updating a split-level in Sicamous, modernizing a ranch home in the Shuswap, or completely reimagining a property in the Okanagan, the right renovation partner makes all the difference. Kreeative Renovations & Design Co. brings over three decades of experience to every project, working closely with homeowners to transform visions into reality through thoughtful design and expert craftsmanship. Talk to Kreeative about your next project and discover how professional guidance can maximize your renovation investment while creating the home you've always wanted.


